
Usherpa divides your database into general types--Customers, Prospects, Leads, and Business Partners--so that everyone in your database receives the most relevant marketing.
But did you know you can customize your own smaller subcategories using the Groups feature? Think of them similar to hashtags; you use Groups to subdivide your database by shared traits. For instance, you may want to segment your top 10 referral partners, or tier your Business Partners by rankings. Or maybe you want to group past clients by loan data like LTV so you have an easy call list for finding new HELOC prospects.
Get as inventive as you want! Groups allows you to easily take quick actions on your custom lists like ordering from the marketing portal, or creating custom tasks.
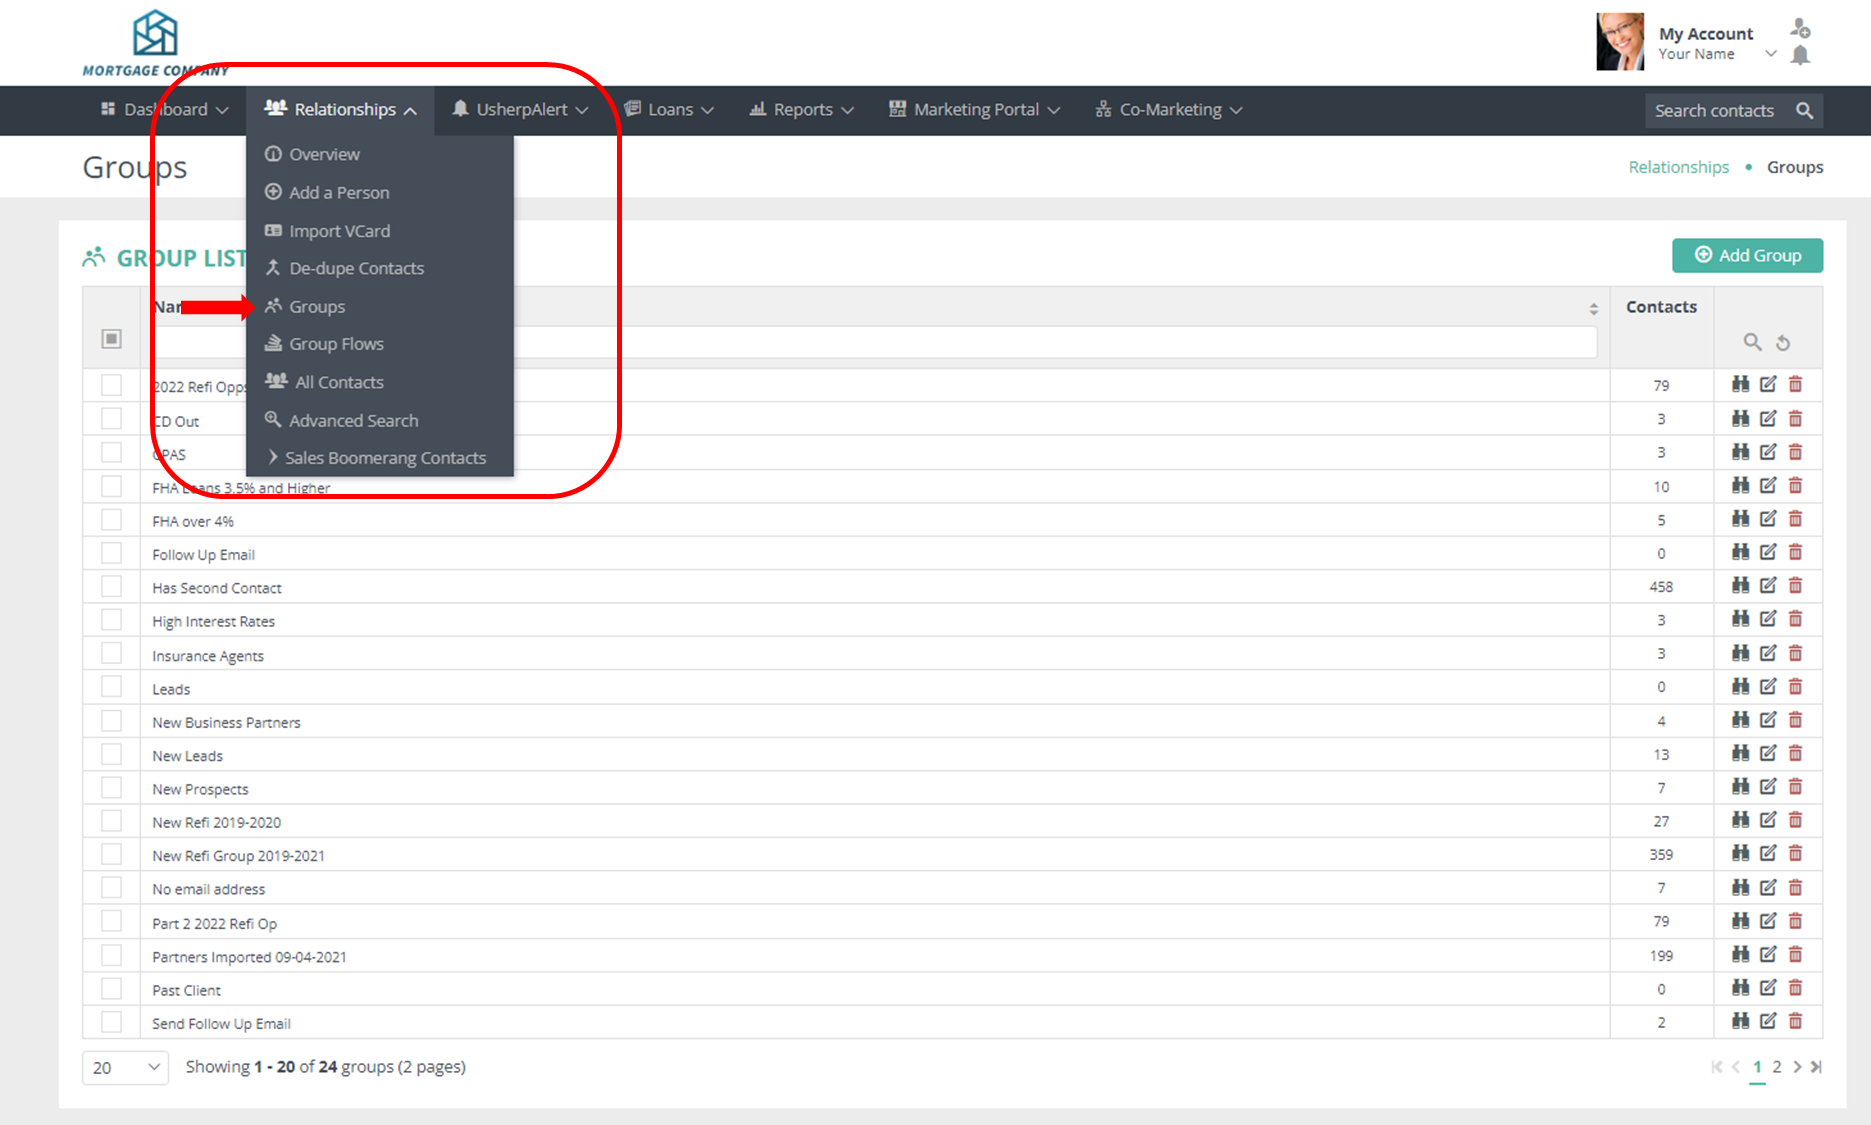
To create a custom Group, select Groups from the Relationships tab.
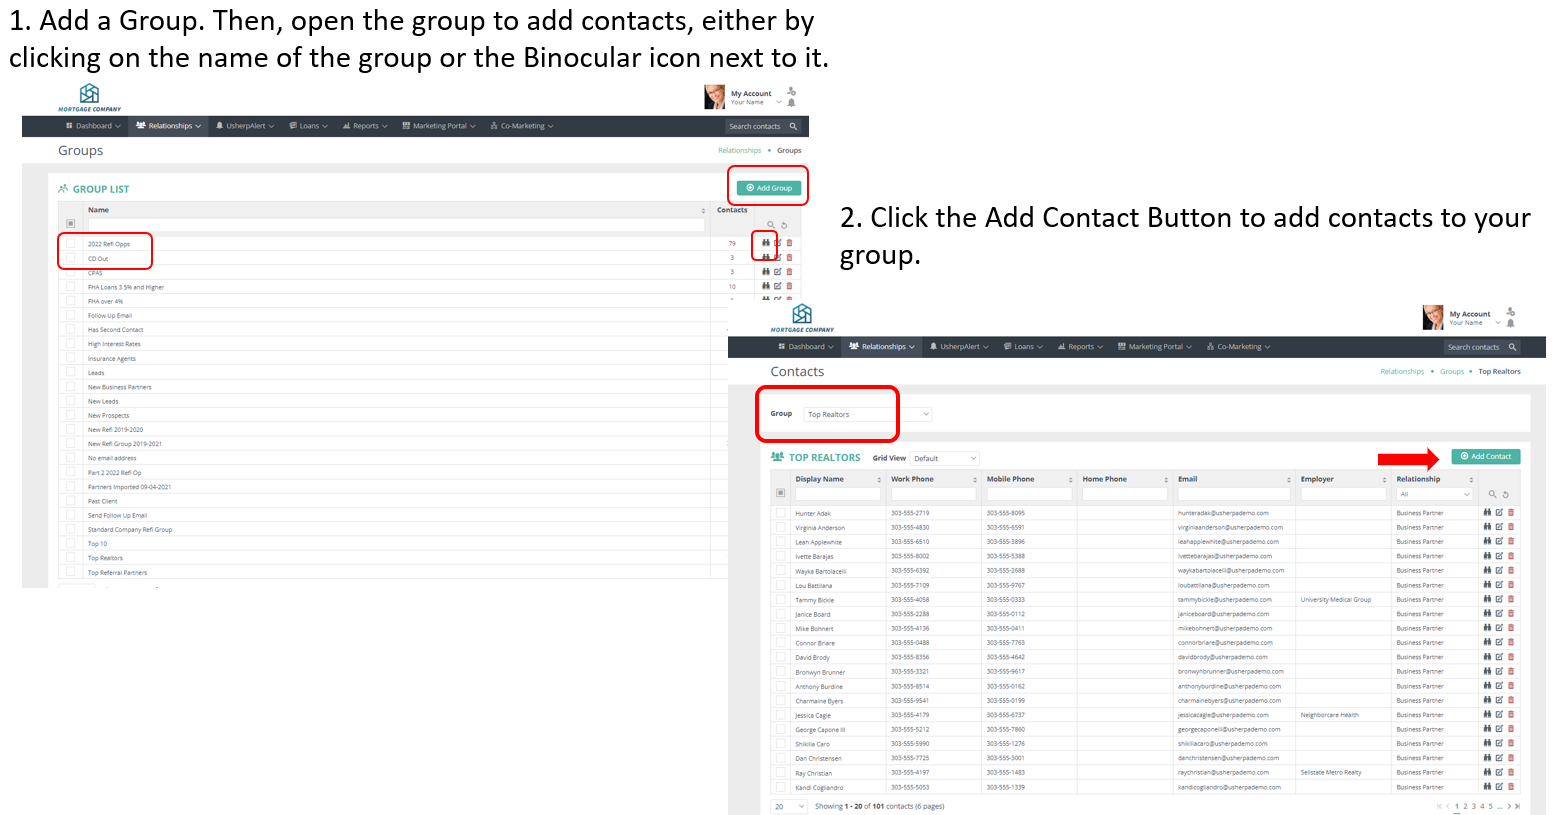
Then simply click the Add Group button on the right hand corner. Type in the name of your group and click Save.

Now that your Group is created, click on the name of the group, or the Binocular icon next to it to view. From here, add contacts to your group using the Add Contact button on the right hand corner of your screen. For example, add your Top Realtor partners to a group so you can easily set up call reminders and other tasks.
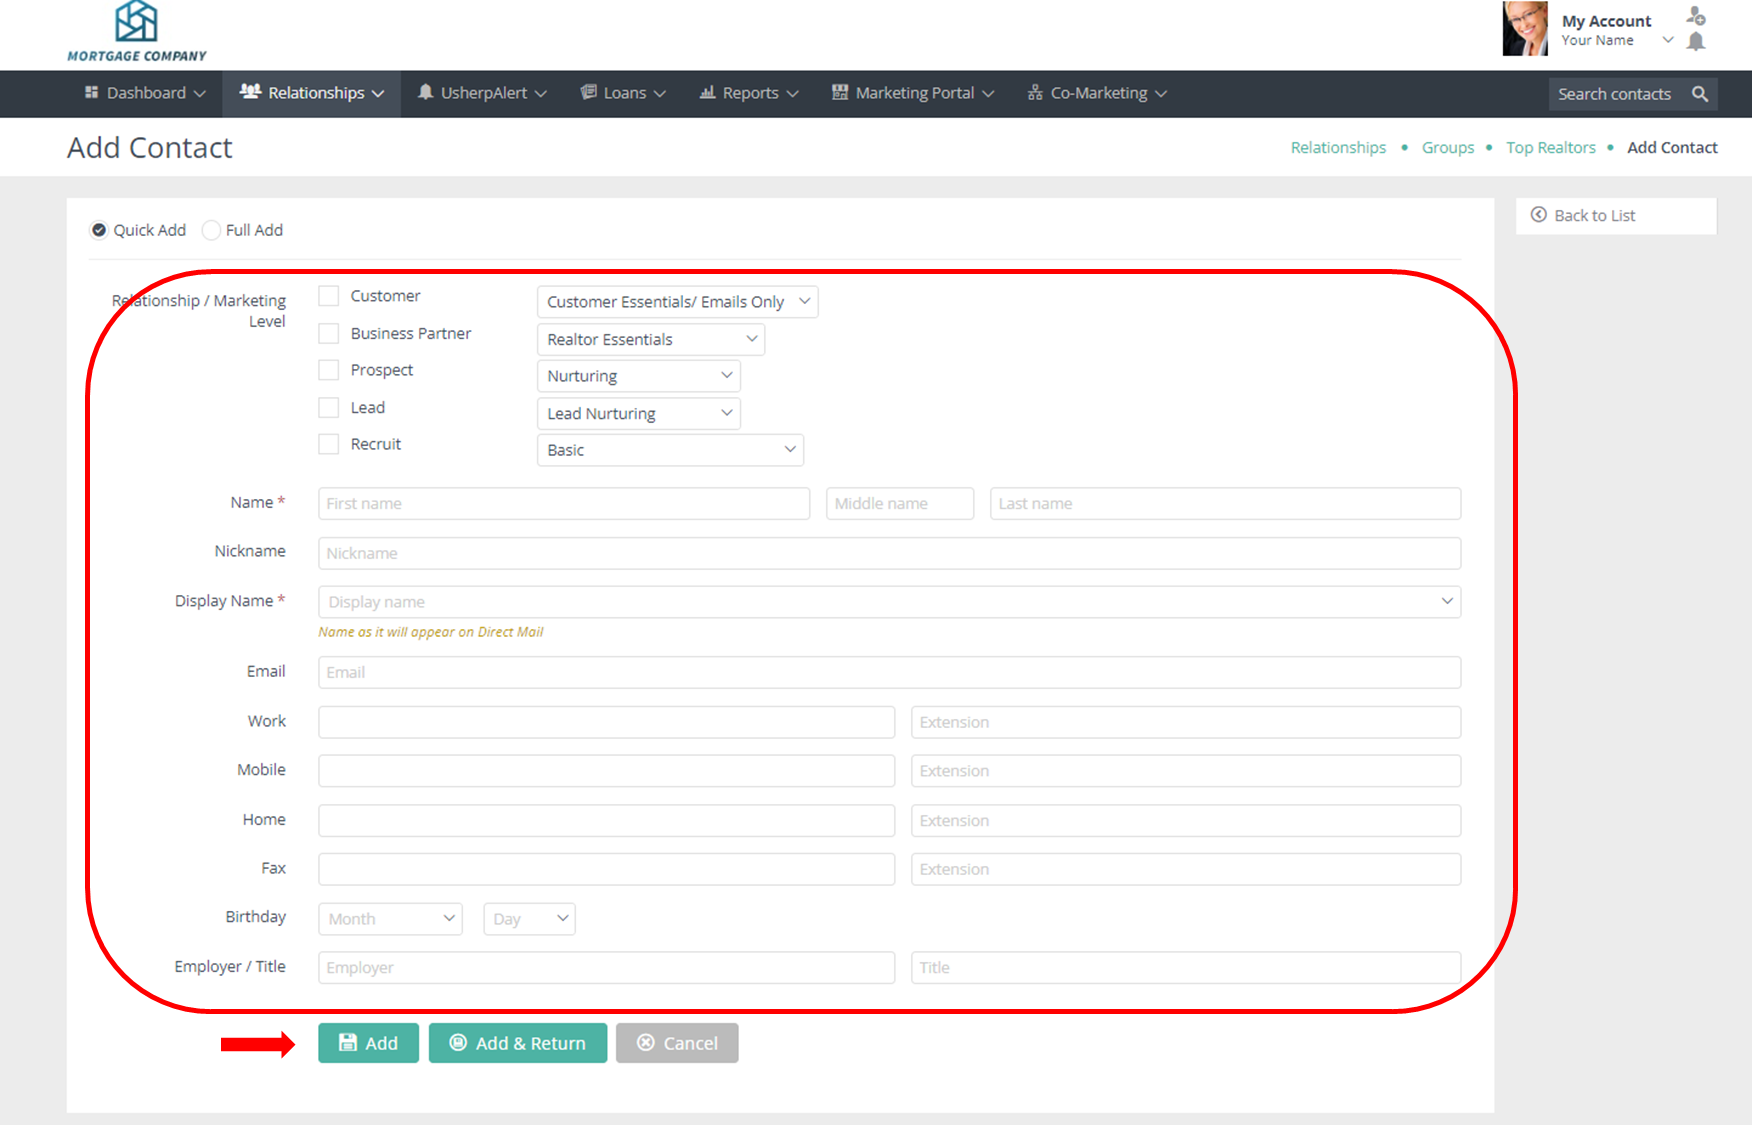
Fill in the contact details and click Add.
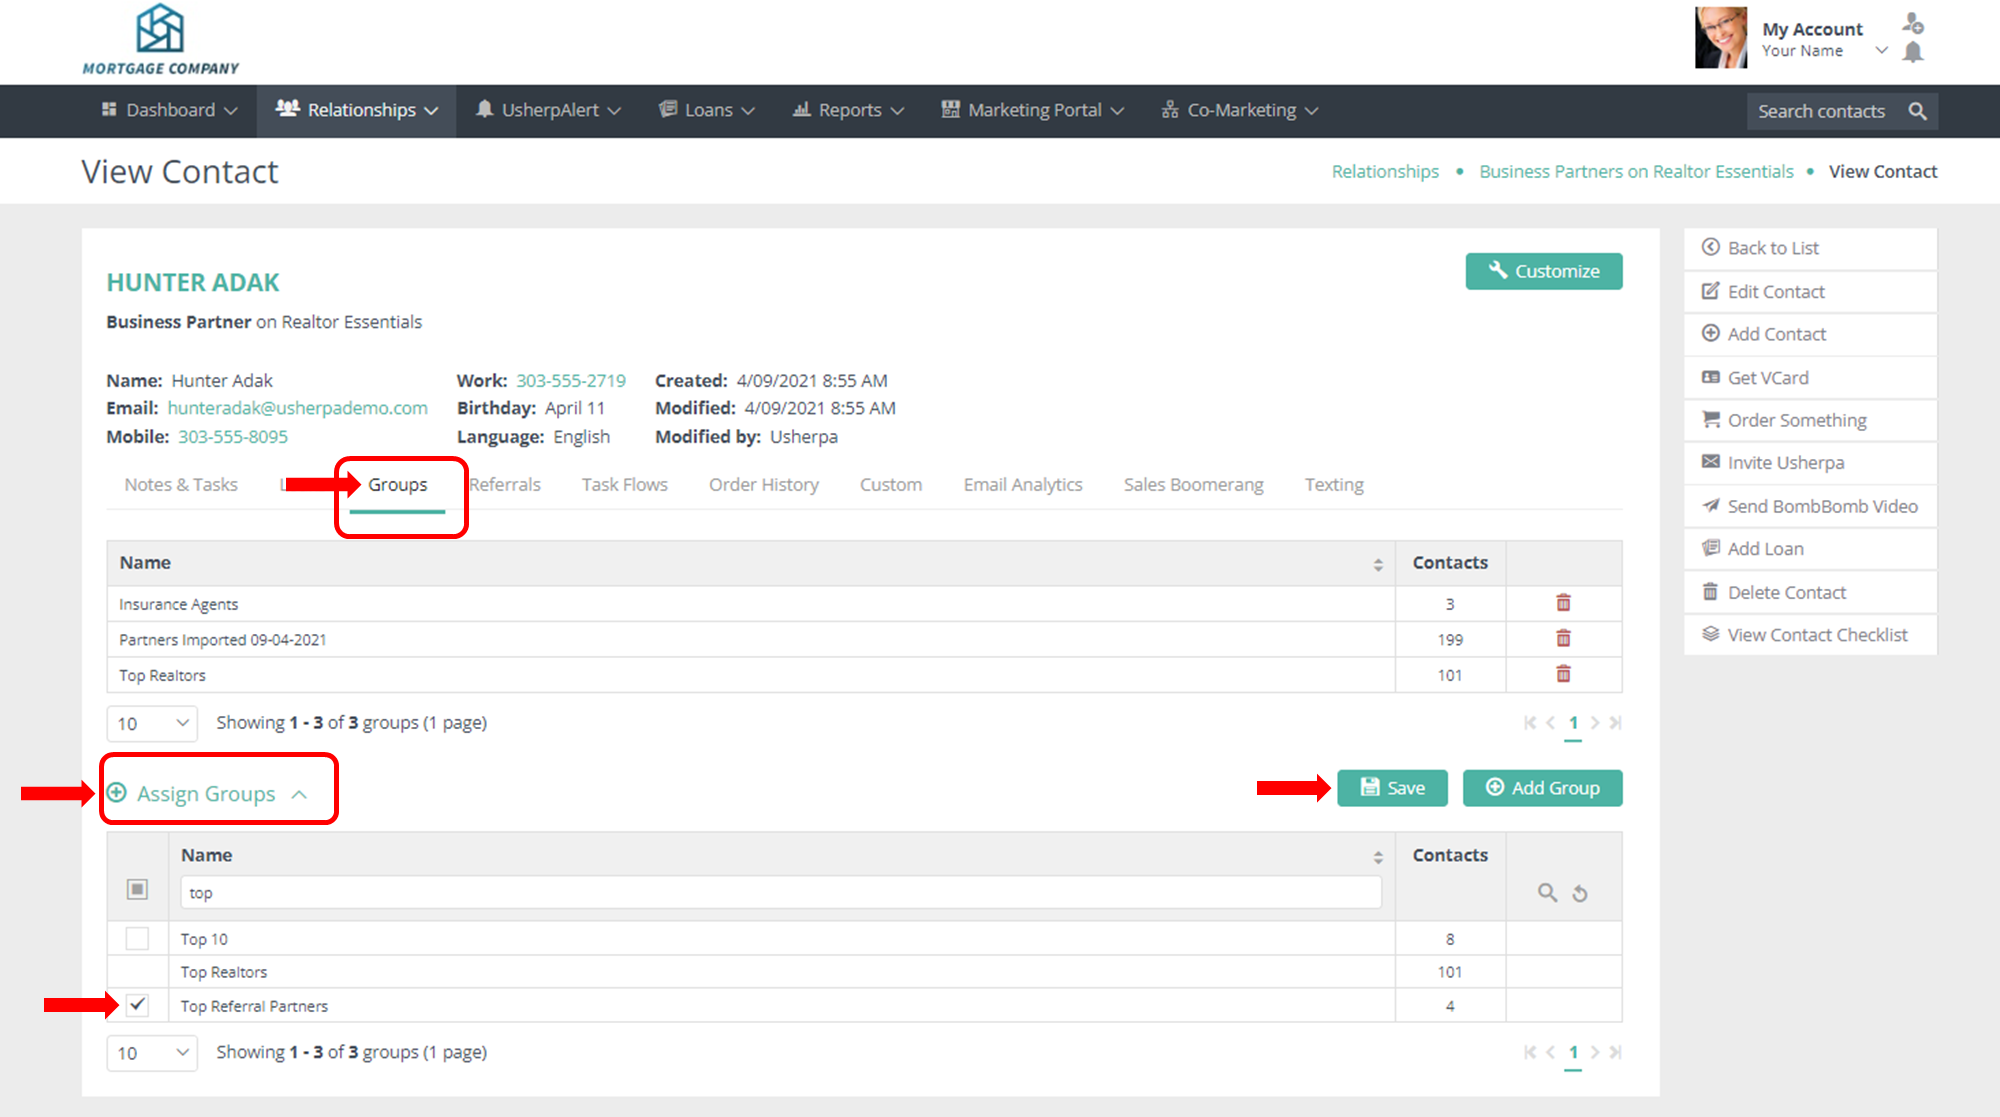
You can also add individual contacts to groups from the contact record. Open the contact record, select Groups, click Assign Groups, search for the group you want to add them to and select the box next to the group name, click Save.
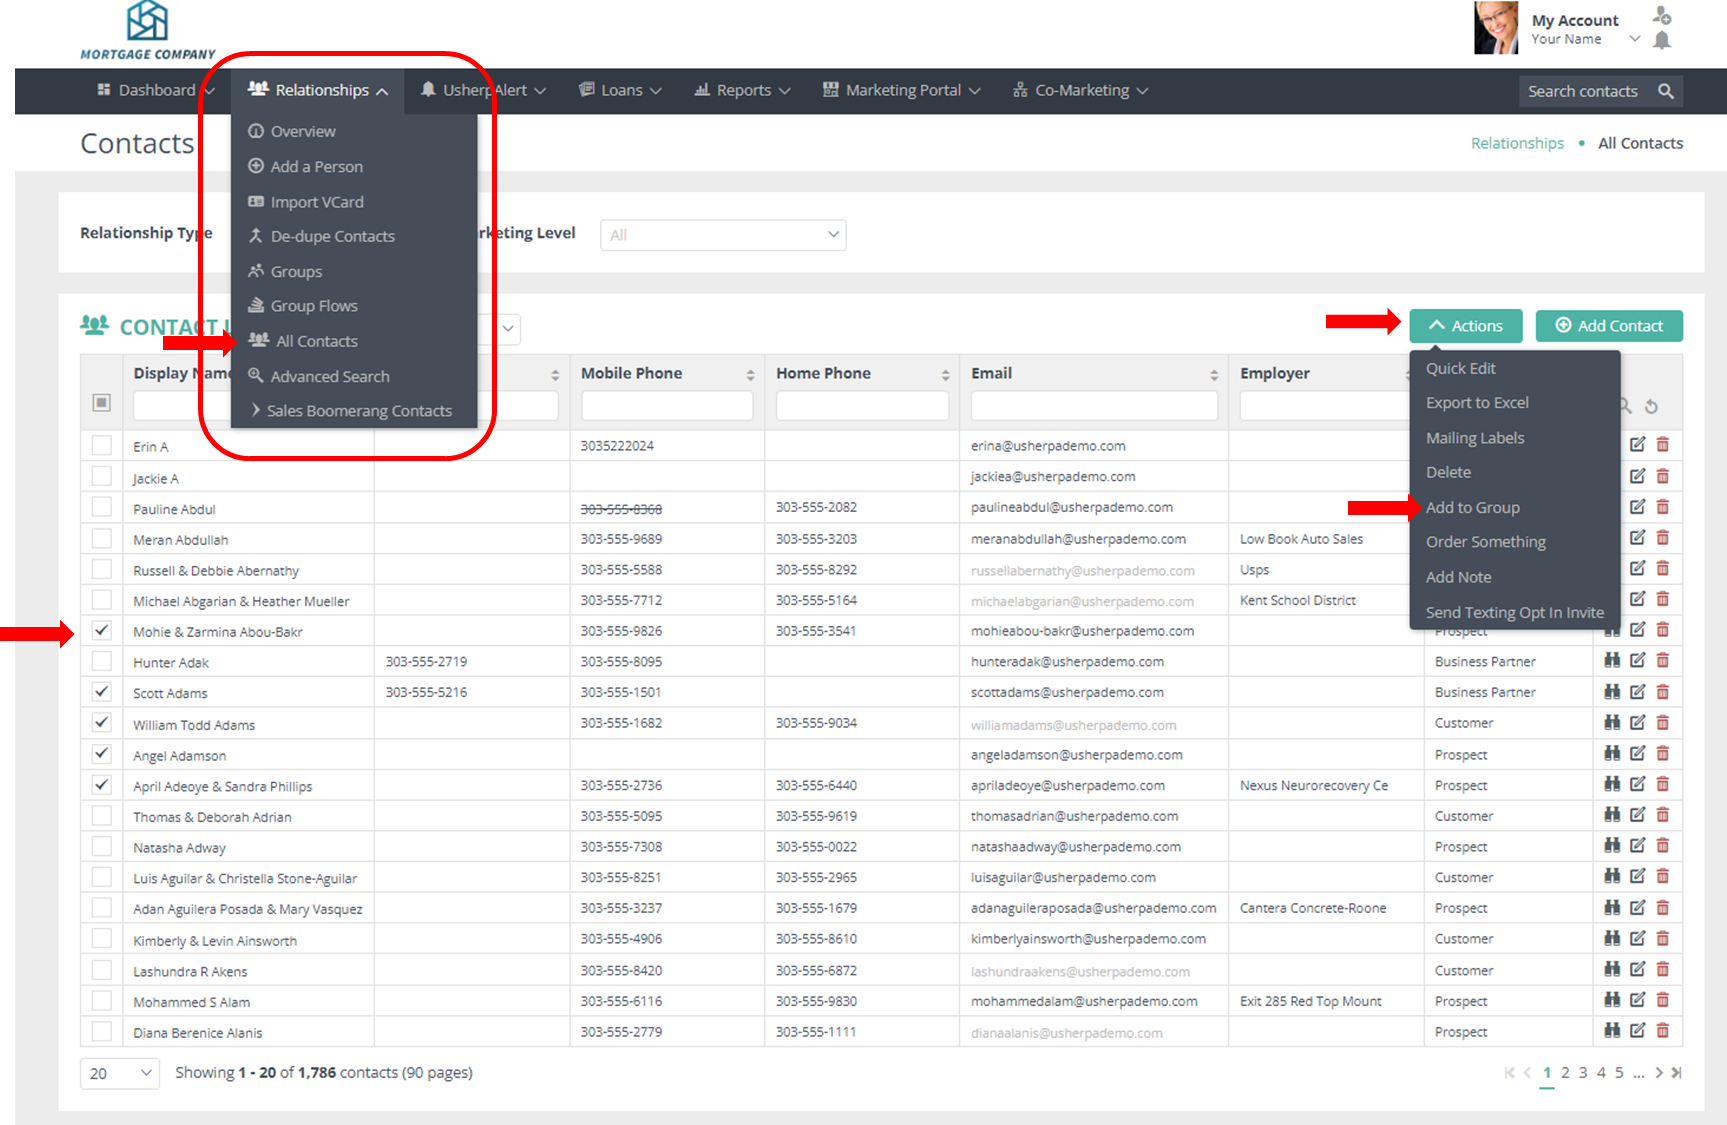
Or add multiple contacts. Click All Contacts from the Relationship Tab dropdown. Select contacts you want to add. Then select Actions, Add to Group.
In this video you will learn how to create and manage your groups.
Comments
0 comments
Article is closed for comments.